Heat Pump

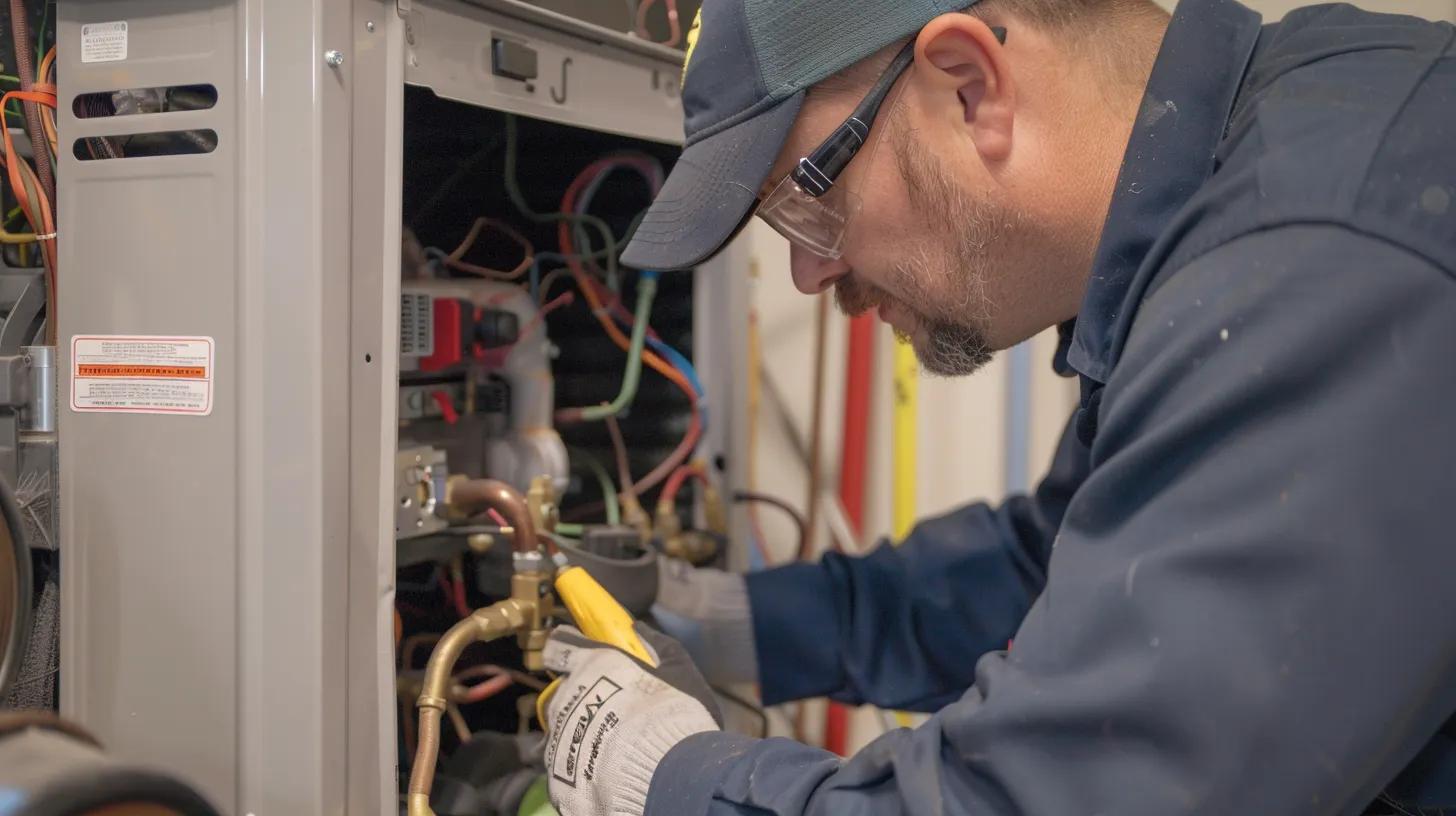
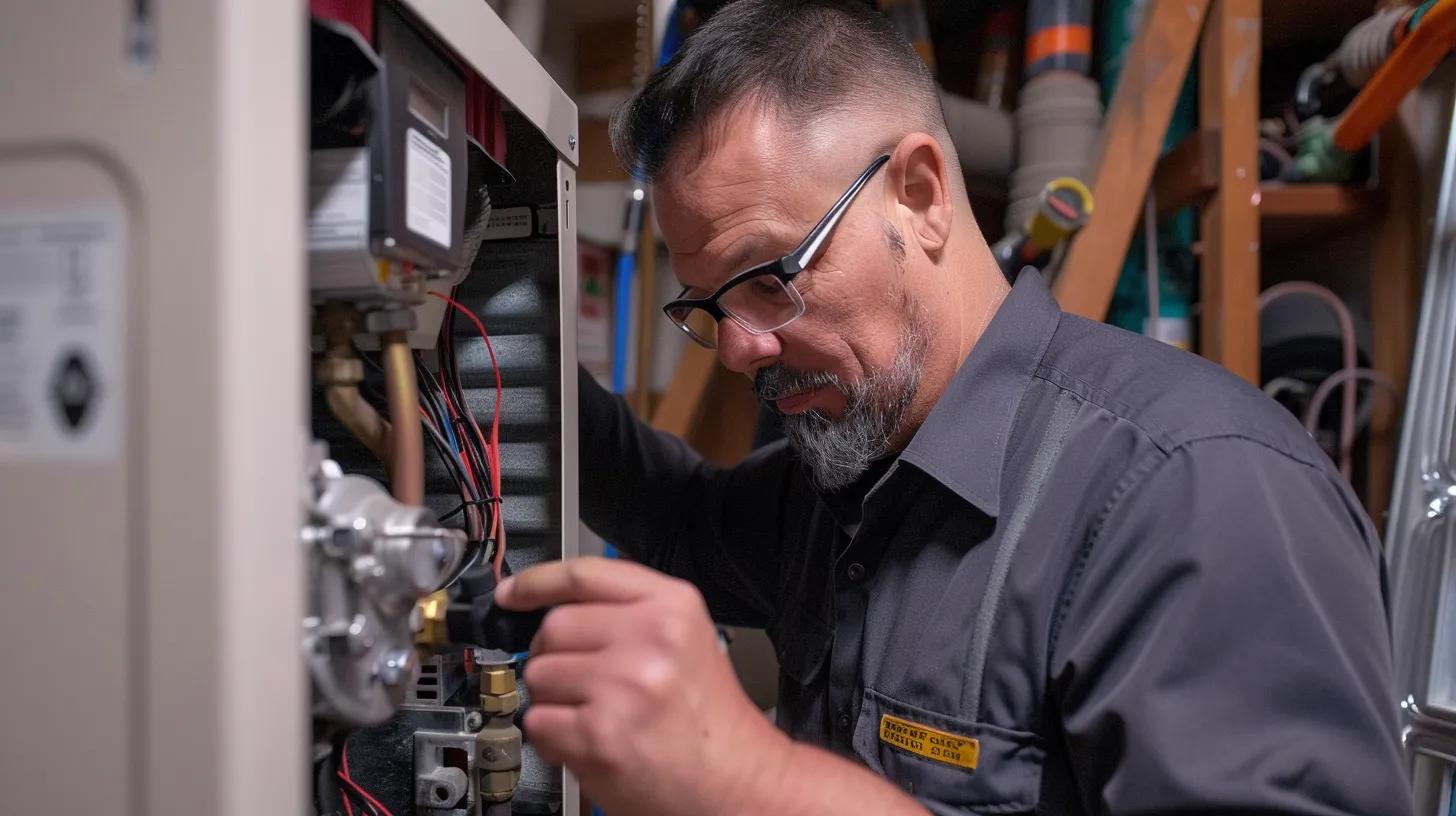
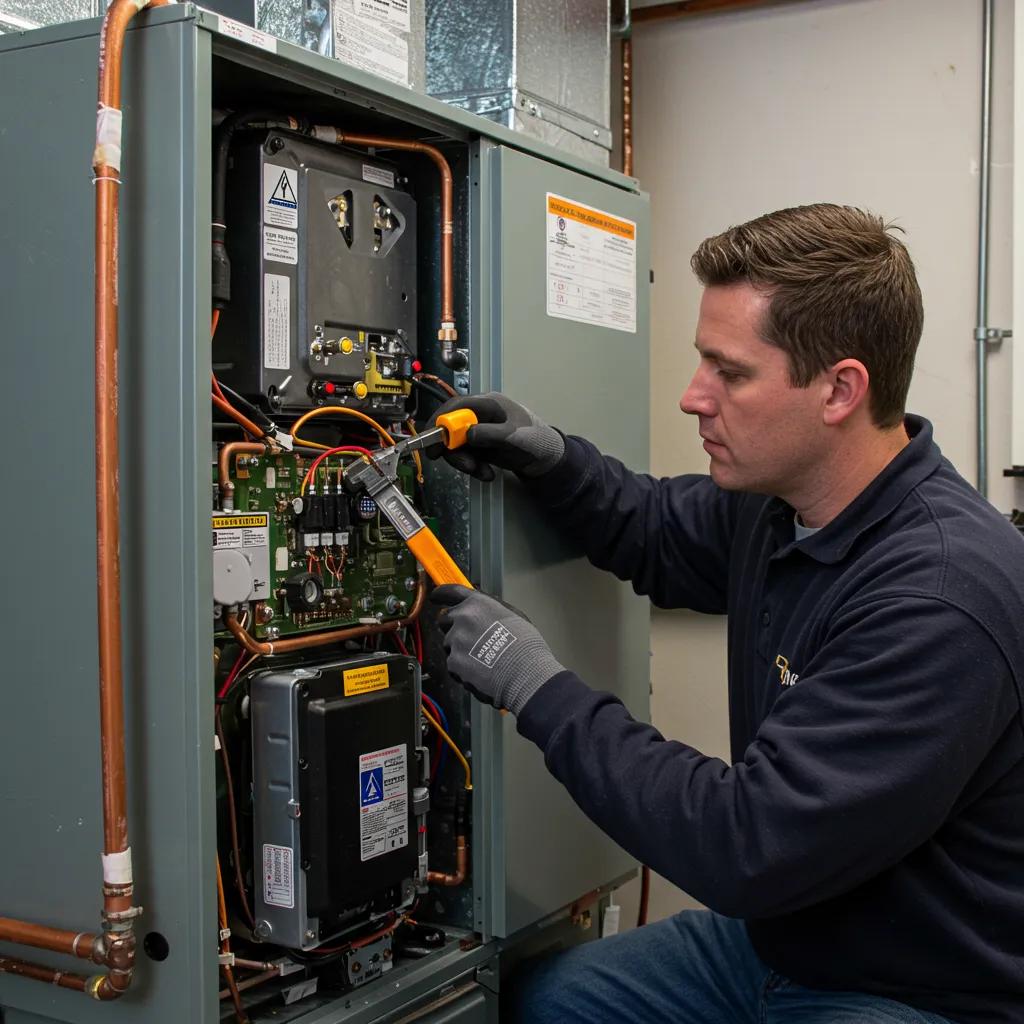
Troubleshooting Heat Pump Defrost Cycle Problems

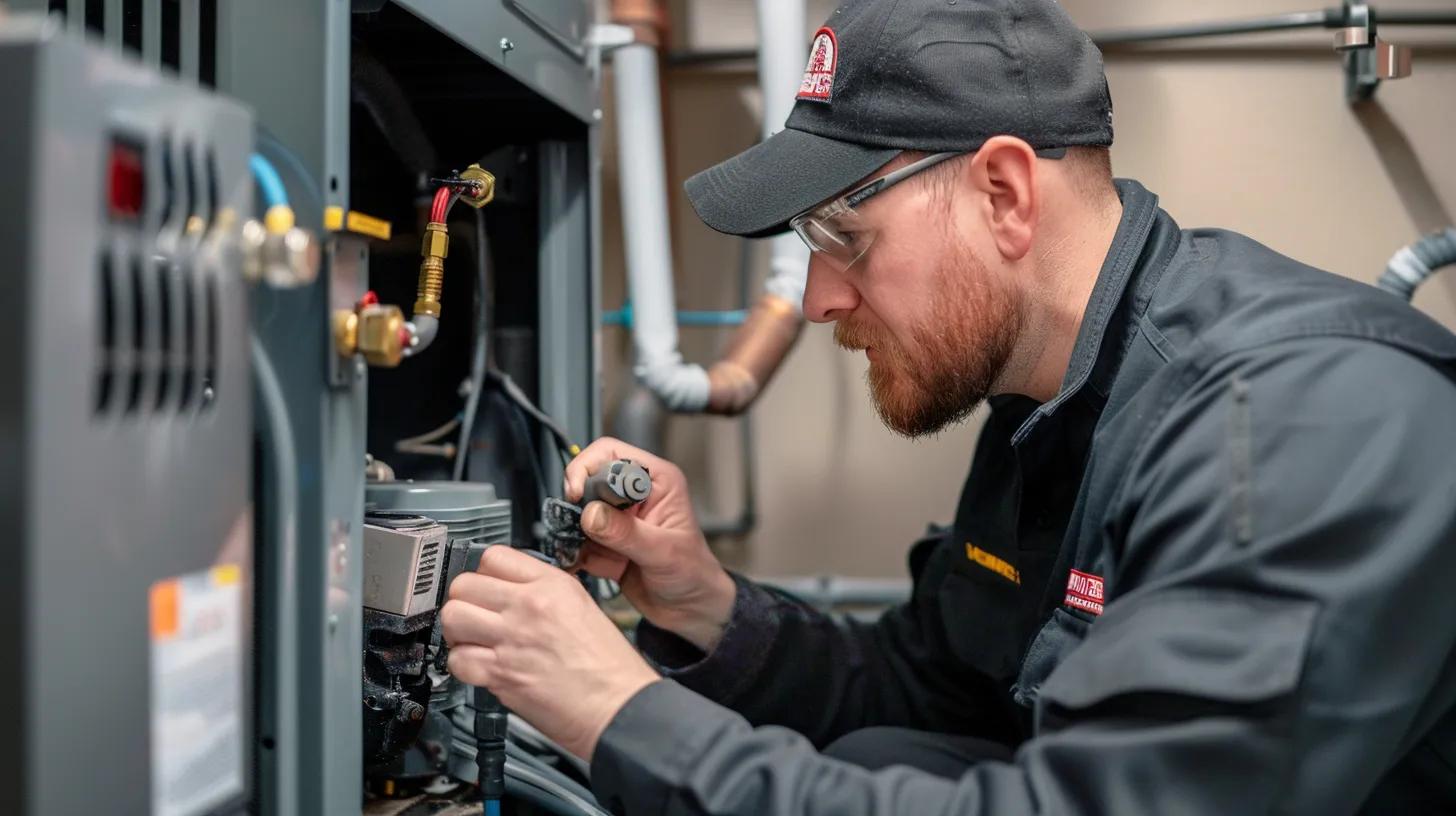
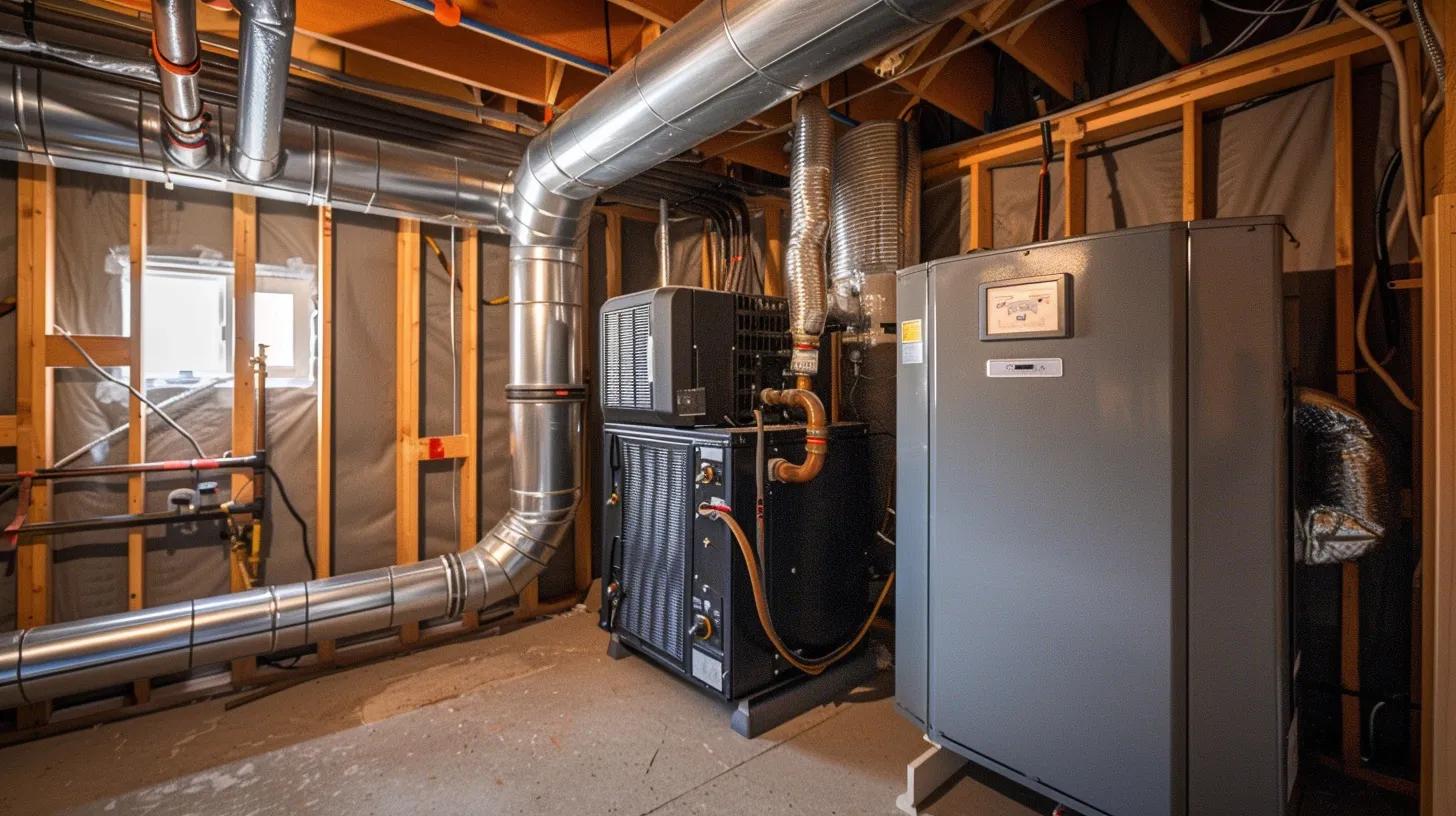
For many homeowners in Duluth, a heat pump works year-round to manage indoor temperatures. During the colder months, it pulls heat from outside air and pushes it into the home. But when frost builds up on the unit, your heat pump has a built-in cycle to take care of it — the defrost cycle. If that cycle isn’t doing its job, it can lead to performance issues that cause uneven heating or even damage if left untreated.

A defrost cycle problem can sneak up on you. You might notice your home isn’t warming up like it should or hear strange noises from the outdoor unit. These signs might come and go, making it hard to know when to act. Understanding what your heat pump should be doing during colder seasons, and being able to recognize when something’s off, can help you stay comfortable and avoid unnecessary repairs.

Understanding the Heat Pump Defrost Cycle

The defrost cycle is a built-in feature that prevents frost and ice from collecting on the outdoor coil of your heat pump during winter operation. When temperatures in Duluth drop low enough, moisture in the air can freeze on the coil. If too much ice forms, it blocks airflow and makes your system work much harder to keep your home warm.

When the defrost cycle kicks in, the system temporarily switches into cooling mode, which sends warmer refrigerant through the outdoor coil. This melts the frost while the outdoor fan shuts off. Once the unit senses that the ice is cleared, it switches back to heating mode.

The cycle usually only runs for a few minutes and should happen automatically when ice is detected. So if frost keeps building up or your system is stuck in defrost mode for too long, that’s a clear hint something is wrong.

If the defrost cycle isn’t running properly, your system may:

– Struggle to maintain temperature inside your home

– Produce unusually high utility bills

– Run louder or longer than normal

– Show visible frost or ice for extended periods

In short, the defrost cycle is there to help your heat pump keep working in cold weather. If it fails, heating performance drops quickly, especially in places like Duluth, where winter temperatures can swing without much warning.

Common Signs the Defrost Cycle Isn’t Working

It can be hard to tell for sure when a defrost cycle isn’t doing its job. But homeowners in Duluth might notice a few key symptoms that point to an issue.

Here are common warning signs:

1. Heavy frost or ice on the outdoor unit: Some light frost is normal. Thick ice that hangs around and never melts is not.

2. Cold air blowing indoors: If your system switches into defrost mode but fails to return to heating, you’ll start to feel cooler air coming through the vents unexpectedly.

3. Multiple short cycling events: When the system kicks on and off frequently without running long enough to heat your home, it may be trying and failing to enter or exit the defrost cycle.

4. Unusual sounds from the outdoor unit: A loud swooshing sound is expected during defrost mode. But banging, clanking, or hissing sounds could point to trouble.

5. Ice buildup leading to a shutdown: If the coil freezes over entirely, your system may stop working until it defrosts or is shut down manually.

For example, a Duluth homeowner might notice that every morning, the outdoor unit looks frozen solid while the inside of the house feels colder than the thermostat setting. If this happens day after day, it’s worth looking into.

Frost should not linger for hours, and once you see these signs, it’s time to act before the issue leads to a total system failure.

How to Troubleshoot Defrost Cycle Issues

When a defrost cycle problem is suspected, it’s worth checking a few basic things before scheduling a service visit. Some signs may seem technical, but a quick visual or behavioral check of your heat pump can give you useful information. Keep in mind, though, that most internal issues will require diagnosis and repair by our technicians.

Here’s a simple troubleshooting checklist homeowners in Duluth can follow:

1. Look for frost buildup – If the outdoor coil is covered in frost or ice for more than 30 minutes, that’s a red flag. Brief ice buildup that disappears quickly is normal. Persistent ice is not.

2. Listen for the reversing valve switch – During a working defrost cycle, you should hear a noticeable whooshing sound when the system changes modes. No sound or a long pause without heat could indicate a problem with the reversing valve or control board.

3. Check the outdoor fan – During defrost, the fan should stop while the compressor runs. If the fan keeps spinning, the defrost cycle might not be activating correctly.

4. Watch the thermostat pattern – If your home never feels as warm as the set temperature and the system seems to run endlessly, defrost cycle issues could be part of the problem. Inconsistent temperatures are often a symptom.

5. Inspect for debris or blocked airflow – Leaves, snow, dirt, or other debris around the outdoor unit can affect airflow and lead to problems with freezing. Clearing the area around the heat pump may help.

These simple steps can tell you if something doesn’t look or sound right. Still, figuring out what exactly caused the issue typically goes beyond a basic check. Electrical faults, control board errors, or sensor failures are not visible and they can’t be fixed without the right tools. That’s where our technicians come in.

When To Call Our Professionals

If your heat pump is constantly forming ice, making unusual noises, or simply not keeping your home warm, it’s time for professional support. The defrost cycle involves components like temperature sensors, relays, timers, and reversing valves, all of which must work together for a smooth defrost process. If any of these are faulty, they need to be identified and replaced by trained hands.

Here’s when it’s time to stop troubleshooting on your own:

– You’ve cleared debris and checked airflow, but the unit still develops heavy frost

– The system switches into defrost mode and never recovers to regular heating

– You hear loud or unusual noises coming from the outdoor unit during defrost operations

– Temperature inside remains too cold no matter how high you set the thermostat

Part of the issue with defrost cycle problems is that they may appear only during certain weather conditions. By the time things get extreme again, the issue tends to be worse. That’s why fast action can protect both your system and your home comfort.

Maintaining Your Heat Pump in Duluth

Duluth’s winter weather can shift quickly, and your heat pump needs to be ready for changing conditions. Preventative care is one of the best ways to avoid defrost cycle issues altogether. Small steps taken regularly can help your system stay consistent even through long cold spells.

Here are helpful practices you can follow at home:

– Keep the outdoor unit clear of debris, snow, and dirt

– Trim back shrubs and plants by at least two feet around the unit

– Make sure gutter runoff doesn’t drip directly over the heat pump

– Check air filters indoors at least once a month during heavy use

– Schedule seasonal checkups before colder months set in

Since heat pumps in Duluth run through both heating and cooling seasons, they go through more wear than seasonal systems. A working defrost cycle in winter is just one piece of the bigger picture. Improper cycling, missed cleanings, or poor airflow can all cause more strain and eventually lead to system failure. A heat pump that’s maintained well just works better and lasts longer.

Keeping Your Heat Pump Running Smoothly in Duluth

Spotting a defrost cycle issue early can save you time, money, and a lot of discomfort during colder months. If your heat pump seems to be stuck in defrost more often than usual, isn’t heating well, or shows visible signs of ice buildup, your system may be overdue for professional care. These problems rarely fix themselves and tend to get worse without attention.

For homeowners in Duluth, being able to recognize the signs of trouble and understanding when to ask for help can go a long way. Don’t let a small issue become a bigger one. Having your heat pump checked out by trained professionals can make sure the defrost cycle and the whole system continues delivering the comfort your household relies on.

Keep your home warm by addressing defrost cycle issues promptly. If your heat pump shows signs of ongoing trouble, consider scheduling professional heat pump repair in Duluth to get your system working reliably again. Our technicians at Just Cooling ATL understand the importance of regular upkeep in preventing further complications. For a quick estimate or to book a service visit, please contact us today.

AC

How to Identify Refrigerant Leaks in Your AC System

When summer temperatures rise in Duluth, a well-functioning AC system can make all the difference in staying comfortable at home. But when your system starts losing its ability to cool properly, it’s not just uncomfortable — it can quickly drive up your energy bills and even lead to damage if neglected. One of the most common and hard-to-spot issues involves a refrigerant leak. Left unchecked, this can reduce your system’s efficiency and lead to costly long-term repair needs.

Refrigerant plays a key role in how your AC system cools the air. If it starts leaking, your unit will have to work harder to deliver the same comfort level you expect, but with much more strain. Recognizing when there may be a leak and acting early can help keep your home cooler while avoiding unnecessary breakdowns. Understanding the warning signs and knowing what to do next can help prevent larger problems down the line.

Signs of a Refrigerant Leak

Every component of your AC should run smoothly when properly maintained. When there’s a refrigerant leak, it affects the entire cooling process. The refrigerant in your system absorbs heat from the indoor air and releases it outside. If there’s not enough of it due to a leak, cooling slows down or stops.

Here are key signs to watch for:

– Warm air from vents: If your AC is running but the air feels warm or less cool than usual, that’s a red flag.

– Hissing or bubbling noises: These sounds can come directly from the area where refrigerant escapes through small holes or cracks.

– Weak airflow: Your system may not push air as strongly through the vents because it’s working harder without enough refrigerant.

– Longer cooling cycles: If your AC seems like it’s taking a lot longer to cool your home or it never reaches your thermostat setting, a leak could be to blame.

– Higher energy bills: You may notice an unexpected spike in energy use as your system struggles to maintain cooling.

One common mistake homeowners make is assuming a refrigerant leak only means the AC is low on freon. But systems don’t use up refrigerant like a car uses gas. If it’s low, there’s a leak.

Immediate Steps to Take

Once you notice signs that point to a refrigerant issue, acting quickly can help prevent further damage. Even if the problem seems minor, refrigerant leaks can lead to frozen evaporator coils, poor cooling, and compressor failure.

Here are the first steps you should take:

1. Turn off your system: If you suspect a refrigerant leak, turn off your AC. Running it without enough refrigerant can lead to major damage.

2. Check the thermostat settings: Make sure the unit isn’t running unnecessarily or working too hard by mistake.

3. Look around the indoor and outdoor units: While refrigerant itself is not visible, you might see signs like ice on refrigerant lines or puddles that can hint at freezing and thawing cycles.

4. Listen closely: Stand near your AC unit and listen for any unusual noises, like hissing or bubbling. These could be coming from a leaky component.

5. Note performance changes: Write down when you started noticing cooling issues and what symptoms you’ve seen. This helps later during professional evaluation.

Avoid the temptation to seal small leaks yourself or recharge refrigerant as a quick fix. Refrigerant handling requires proper certification due to environmental and health safety concerns, and temporary repairs without proper tools can often make things worse.

It’s always best to have our technicians inspect and repair these leaks using the right equipment and methods. Acting early can keep comfort high and repair costs down.

Why Professional Help Is Necessary

Refrigerant leaks in AC systems aren’t as simple as patching a hole or topping off refrigerant. These issues often come from deeper system faults, like worn-out connections, deteriorated coils, or improper installation. To the untrained eye, these problems might not seem significant, but they can lead to long-term damage if ignored or handled incorrectly.

Trying to fix a leak yourself can make the situation worse, especially without the right tools. Refrigerant is held under pressure, and locating a slow leak inside coil fins or copper tubing takes more than just a flashlight. Our professionals use leak detectors that can find even the smallest drops, which ensures the problem is handled properly the first time around.

There’s also the matter of safety. Refrigerants are chemicals that, when not handled correctly, can pose health risks or affect nearby surfaces and the indoor environment. For example, exposure to refrigerant gas when trying to repair a line could lead to health problems if inhaled or if it comes into contact with skin. There are also environmental requirements around handling and disposal. This is why only certified technicians are authorized to work with refrigerants.

Early inspection and servicing can also prevent damage to more expensive parts like the compressor. Letting a system run with low refrigerant too long can result in overheating and motor strain. What starts as a small leak could end up shortening the life of your system if not repaired the right way.

How Our Professionals Can Assist

Once a refrigerant leak is confirmed, the first goal is to identify its exact location. Our professionals use specialized tools to measure pressure levels, scan for hidden leaks, and test system performance. Some leaks are external and easier to spot, but others may occur deep within the coil or the lines running through walls and attics.

Here’s how the process usually works:

– Pressure testing reveals if there’s a refrigerant imbalance in the system.

– An electronic detector or dye test helps find the leak location without opening up large parts of the system.

– Once identified, the leak source is properly sealed or the damaged part is replaced.

– The entire system is then evacuated, vacuumed, inspected for moisture, and recharged with the correct amount of refrigerant.

– Before finishing, checks are done to confirm that the fix holds, the system holds pressure, and cooling performance returns to normal.

Our technicians take steps to make sure the same issue doesn’t pop back up. Whether it’s reinforcing joints, replacing cracked lines, or advising on usage habits that help prolong equipment life, the goal is to prevent repeat visits and protect your AC investment long term.

Keep Your AC System Reliable in Duluth

When refrigerant leaks go unchecked, cooling comfort becomes harder to reach in the heat of Duluth summers. What starts off as warm air or odd noises can grow into system failures or parts that need full replacement. Quick attention from experienced technicians helps prevent bigger issues and restores your system to full performance.

With the high demands placed on AC units during the summer months, small problems can snowball fast. Being aware of the warning signs, knowing when to shut the system down, and calling in trained professionals for diagnostics helps resolve the issue before it turns into something that disrupts your home’s entire comfort system. Regular care and professional repair make a big difference in how reliable your AC stays through high temperatures.

Facing cooling issues may indicate that your system needs a prompt professional evaluation to prevent further damage. Addressing refrigerant leaks early can help avoid a complete breakdown, and our professionals provide AC repair in Duluth that targets the root cause of these problems. Just Cooling ATL works to maintain your home’s comfort throughout the summer months in Duluth, so for a quick estimate or to book a service visit, please contact us today.

AC Thermostat

What to Do When Your AC Thermostat Isn’t Responding

A working AC thermostat is one of the most important parts of keeping your home comfortable during a hot Duluth summer. When it starts to act up or stops responding altogether, it can make your entire cooling system unreliable or unusable. If your thermostat doesn’t respond, it often means your AC won’t turn on or maintain the right indoor temperature, both of which can quickly make your home feel stuffy and unbearable.

There’s also the added worry that thermostat issues could point to something more serious, like an electrical problem or system short. That’s why it helps to have a clear path to follow when figuring out what’s going on. Before your home turns into a sauna, it’s worth taking a careful approach to troubleshoot what’s wrong and decide if help from our technicians is needed.

Check the Basics First

When a thermostat stops responding, the problem may seem big at first, but sometimes it’s something minor that’s easy to overlook. Start by checking these basics before jumping into anything more advanced:

1. Make sure the thermostat is actually turned on. While it sounds obvious, it’s a common reason for the system not responding. Someone may have unintentionally switched it off.
2. If the screen is blank or not lighting up, check if it’s receiving power. For wall-powered units, you might want to look at the circuit breaker and make sure nothing’s been tripped.
3. Inspect the wiring or connections if it’s safe to do so. In some cases, loose or disconnected wires may interrupt communication between the thermostat and the AC unit.
4. Confirm that it’s set to the correct mode. Double-check the cooling setting and adjust the set temperature to a few degrees lower than room temperature to force the unit to turn on.

These minor checks are quick and don’t require any tools. People often assume a system failure, but a simple setting or power reset is enough to get the thermostat back on track. For instance, some homeowners believe their AC is broken when it’s just that heat is selected instead of cool.

Inspect and Replace Batteries

If your thermostat uses batteries and the screen is dim or completely off, dead batteries could be the reason it isn’t responding. This small part of thermostat operation is easy to forget because battery life can last for months or longer, but when the power drops too low, the thermostat can no longer signal the system.

Here’s how to handle it:

– Remove the thermostat faceplate to access the battery compartment. For most models, this involves gently pulling or sliding the unit off its wall mount.
– Use the same type and size of batteries. If you’re unsure, most thermostats take AA or AAA batteries, which should be confirmed by checking the label or user guide.
– Insert the fresh batteries and reinstall the thermostat. Wait a few moments to see if the display powers up and communicates with your AC.
– Try resetting the thermostat if there is still no display. Some models include a reset button or require holding two buttons at once.

This quick fix often solves issues without needing service. If fresh batteries don’t restore function, the problem might lie deeper, either with wiring, software glitches, or internal malfunctions. Still, checking the batteries is one of the easiest ways to avoid an unnecessary service call.

Examine the Thermostat Location

It can surprise homeowners how much thermostat placement affects how well it works. When a thermostat is installed in a poor location, its sensors pick up incorrect temperature readings. This can lead to the AC running too long or not long enough because it’s reacting to heat or cool air that isn’t representative of the whole home.

If your thermostat is near the kitchen, a window that gets afternoon sun, or even a supply vent, there’s a good chance it will misread the temperature around it.

Try to evaluate these location factors:

– Is the thermostat in direct sunlight?
– Is it near an oven, stove, or major appliance that generates heat?
– Can it feel airflow from a nearby supply register or drafty window?
– Is it mounted on an exterior wall that heats up during the day?

Proper placement should be on an interior wall in a central location, away from direct sunlight and isolated sources of heat or cold. If your thermostat is in a bad spot, even the most advanced models with smart features can’t respond accurately. Sometimes, just relocating the unit to a better wall makes a difference in system performance.

Troubleshoot Connectivity for Smart Thermostats

If you’re using a smart thermostat and it’s unresponsive, the first place to check is the Wi-Fi connection. Many smart models depend on strong, stable internet to function properly. Without a solid signal, the system may freeze, delay changes, or show offline status unexpectedly.

You can take these simple steps:

– Open the corresponding app on your phone and check the connection status.
– Try restarting your home’s Wi-Fi router and the thermostat at the same time.
– Move the router or thermostat if the signal strength is poor or drops occasionally.
– Look at whether there was a recent software or firmware update and verify it successfully installed.

In some cases, a smart thermostat loses compatibility with the HVAC system, especially if parts like the transformer or control board were recently replaced. If the thermostat won’t reconnect or continues failing to control the system, that’s a strong sign it’s time for a service call. Wiring issues, compatibility problems, or internal system faults may be involved.

Know When to Contact a Technician

If you’ve tried everything, including settings, battery replacement, location checks, and Wi-Fi resets, and your thermostat is still unresponsive or your AC isn’t turning on, it’s time to stop troubleshooting on your own. Continued delays can leave you uncomfortable or even cause further problems with your AC system, especially if it starts short-cycling or shuts down completely.

Here are signs it’s time to reach out:

– The display won’t turn on after changing batteries and confirming power.
– You hear clicks or see changes on the screen, but the AC still won’t respond.
– Comfort settings keep resetting or jumping to incorrect temperatures.
– There’s no airflow even when the thermostat shows the system is running.

Unresolved thermostat issues often point to internal electrical or control wiring failures. A delay in repairs could lead to breakdowns that require more extensive service. The longer the system runs without being properly managed, the more strain it puts on other components.

Keeping Your System and Thermostat Working Together

Avoiding AC delays in summer starts long before your thermostat fails. Preventive maintenance and regular system checkups go a long way in keeping everything synchronized. Many homeowners don’t realize how much one small thermostat problem can limit the entire system’s performance. A few basic checks on battery life, connection strength, and temperature settings done early in the season can save hours of discomfort.

When you’re relying on your cooling system every day in Duluth, it’s worth staying ahead of minor issues before they turn major. Taking the time to monitor and understand how a thermostat should behave is one of the simplest ways to avoid needing emergency AC repair in the peak of summer. With a responsive, well-placed thermostat in proper working order, you’re less likely to be stuck sweating through unexpected cooling problems.

If you continue to experience issues with your thermostat after completing basic troubleshooting, it may be time to consider professional assistance to prevent further inconvenience in Duluth. Home comfort can quickly be affected when your system doesn’t perform as expected, and occasional malfunctions may point to underlying wiring or sensor issues that require expert evaluation. If you need emergency AC repair in Duluth to restore your system’s performance, our professionals at Just Cooling ATL can offer the timely support you need. For a quick estimate or to book a service visit, please contact us today.

AC

Why Your AC Might Be Causing High Humidity Indoors

High humidity inside your home can make rooms feel sticky and uncomfortable even when the air conditioning is running. Beyond comfort, high humidity can create musty odors, encourage mold growth, and trigger certain allergies. It can also cause wood furniture and floors to warp over time. If your AC is running but the air still feels damp, it may be a sign that something is off with your system.

For homeowners in Duluth, the summer months bring high levels of moisture, making it even more important for your AC to manage indoor humidity effectively. Your AC does more than cool the air. It also plays a role in removing moisture from the air. When it fails to do that, the effects can be felt throughout the house. Understanding why this happens can help you act before the problem gets worse.

How Your AC Affects Indoor Humidity

Part of your air conditioner’s job is to reduce moisture in the air as it cools. When functioning properly, your AC pulls warm air over its evaporator coil. This process causes moisture in the air to condense on the coil, just like water droplets forming on a cold glass. The excess moisture gets drained away, leaving your home cooler and more comfortable.

The issue comes when that process doesn’t work correctly. If the system is malfunctioning or undersized for your home, it might still blow cool air without fully removing humidity. So, even though your home feels cooler, it may still feel damp and sticky. This can create an uncomfortable living environment, especially during hot, humid days.

One common example is when you set your thermostat too low, thinking it will cool your home faster. What often happens is the system turns off before it has had enough time to pull moisture from the air. This leads to lower temperatures but higher humidity.

If your home constantly feels muggy even with your AC on, it may be time to take a closer look. There could be an issue with the way your system is regulating both temperature and moisture.

Common Reasons Your AC Might Be Causing High Humidity

Several underlying causes could be making your AC struggle to control humidity. While some may be due to normal wear and tear, others could be tied to how the system was designed or how it’s currently operating.

Here are the most common reasons:

1. Insufficient Cooling Capacity

If your AC is too small for your home, it might run nonstop without actually lowering humidity. Undersized systems don’t dehumidify effectively because they never reach the right operating conditions fast enough.

2. Dirty Coils or Filters

When the evaporator coil or air filter is covered in dust or debris, it affects the system’s ability to transfer heat and remove moisture. Moisture stays in the air, leading to clammy indoor conditions.

3. Low Refrigerant Levels

Without the proper amount of refrigerant, your system can’t absorb heat or control moisture properly. This usually results in poor cooling and an increase in indoor humidity.

4. Incorrect Thermostat Settings

Setting the thermostat to constant fan mode instead of auto can cause previously extracted moisture to get blown back into your home. Also, a poorly calibrated thermostat may cause the system to short cycle, cutting off before it tackles the humidity.

If your AC is consistently leaving your home damp and sticky, it is worth seeing if any of these issues apply to your system. Waiting too long can make the air unbearable and possibly lead to other problems like mold growth.

Importance of Regular AC Tune-Ups

Skipping regular maintenance on your AC can lead to issues that impact humidity control, especially during the hot months in Duluth. Many homeowners assume that as long as cool air is blowing, the system is working fine. But performance issues can build up slowly, especially when internal components are dirty, worn out, or misaligned. One often-overlooked consequence of this is rising indoor humidity.

Routine AC tune-ups help restore your system’s ability to remove moisture properly. During a tune-up, our technicians do more than check the temperature. They also evaluate the condition of internal components, check airflow, and verify refrigerant levels—all of which affect how effectively your AC balances air temperature and moisture.

Key tune-up tasks that improve humidity control include:

– Cleaning evaporator and condenser coils to restore efficient heat and moisture exchange
– Checking and adjusting refrigerant pressure to meet correct specifications
– Inspecting and replacing clogged air filters
– Making sure the thermostat is calibrated accurately
– Examining condensate drains to confirm moisture is draining properly

When these components are functioning the way they should, your home feels cooler and drier—even during the muggiest days of summer in Duluth.

Benefits of Addressing High Humidity with Professional AC Tune-Ups

There is more to fixing indoor humidity than just lowering the temperature. When your AC receives regular tune-ups from our trained professionals, the humidity reduces and several benefits follow.

1. Improved Comfort

Sticky air can make rooms feel warmer than they really are. A tuned AC improves airflow and moisture control, helping each room feel consistently cool and balanced.

2. Healthier Living Conditions

Lower humidity discourages mold and mildew, which are common triggers for allergies. Dry air also means fewer environments where bacteria and fungal growth can thrive.

3. Better Energy Efficiency

If your AC has to work harder to reach and hold temperature levels, it uses more electricity. Preventative service helps your system operate the way it was built to, reducing energy consumption and stabilizing utility costs.

4. Longer System Life

When humidity build-up puts strain on internal parts, breakdowns become more frequent. A well-maintained system avoids that stress. As a result, your AC is more likely to last longer and run better through multiple seasons.

All of these gains are especially important during peak summer in Duluth, when high temperatures and moisture levels can push your cooling system to the limit. Keeping your indoor humidity in check ensures your system can perform without being overburdened.

Restoring Comfort in Your Duluth Home

Humidity control often gets ignored until it starts impacting everyday comfort. If your home feels damp or the air smells musty, your AC may not be doing its full job. Small problems, like dirty coils or poor thermostat settings, may not seem serious but they can contribute to bigger challenges if not fixed.

Investing in routine AC maintenance is a reliable way to prevent those problems and protect your indoor comfort. When performed regularly, a professional tune-up can optimize your system’s ability to control temperature and moisture alike.

Scheduling an AC tune-up in Duluth helps ensure that your system is prepared to manage indoor humidity even during the peak summer season. Whether it involves replacing a filter, clearing the condensate line, or adjusting refrigerant settings, every step taken keeps your home cooler, cleaner, and drier.

Ensure consistent comfort in your Duluth home by keeping your AC in top condition. Regular service helps your system remove excess moisture and maintain an inviting indoor environment. At Just Cooling ATL, we work to ensure that all parts are functioning together to reduce humidity and enhance performance. If you are prepared to secure optimal air quality and a comfortable living space, consider scheduling an AC tune-up in Duluth, and for a quick estimate or to book a service visit, please contact us today.

AC

How to Address Uneven Cooling in Different Rooms of Your Home

When your home feels cool in one room and warm in another, it’s more than just an inconvenience. Uneven cooling often leaves people adjusting the thermostat multiple times a day, only for the problem to stay the same. During a hot summer in Duluth, having an AC system that doesn’t cool your entire home evenly can wear down your comfort level and lead to frustration quickly.

Uneven cooling usually shows up as hot bedrooms, chilly living areas, or stuffy upstairs spaces. These imbalances strain your HVAC system over time and make energy use less efficient. If your home constantly feels off, even after adjusting settings or closing vents, the issue may go deeper. Figuring out the cause helps avoid wasting energy and keeps your cooling system running like it should.

Common Causes of Uneven Cooling

There isn’t just one reason why some rooms feel hotter than others. These problems are usually tied to airflow, insulation, or the overall design of your system. Spotting which factor is causing the trouble is the first step to getting balanced cooling back.

One of the most common issues is poor insulation. If certain rooms weren’t built with proper insulation or have areas where insulation has worn down, they’ll heat up faster. This is especially true for rooms that get more sun exposure during the day. Even if your HVAC system works well, cooled air will leak out quickly in uninsulated zones.

Blocked or closed vents are another factor. Air can’t flow evenly if vents are shut or something is placed in front of them. Sometimes furniture, curtains, or boxes in storage rooms end up blocking supply vents without anyone noticing. This changes how air moves and can lead to warm pockets in the home even while the AC is still running.

Dirty air filters can also bring on cooling issues. When filters are clogged, less air passes through. That makes the system work harder and can reduce airflow to rooms farthest from the unit. It’s easy to overlook a filter change during a busy month, but it makes a noticeable difference in cooling distribution.

Lastly, an incorrectly sized HVAC system causes temperature imbalances. If the unit is too large for your house, it will cool the space too quickly and then shut off without running long enough to push air into every room. If it’s too small, it’ll run almost constantly but still struggle to meet cooling demands. In both cases, rooms at the end of the ductwork often get left out.

Here’s a quick list of warning signs that may suggest one of these issues:

– One or more rooms feel consistently warmer or cooler than others
– You hear airflow in some vents but not others
– The thermostat shows the correct setting, but the room doesn’t reflect it
– Your system turns on and off quickly but doesn’t seem to cool fully
– Energy bills rise even when usage seems normal

If one or more of these happens often, it’s worth taking a closer look. Uneven cooling doesn’t usually fix itself. Addressing the problem early helps reduce strain on your HVAC equipment and can improve your home’s overall comfort through the rest of the summer.

Solutions to Address Uneven Cooling

After finding the likely cause of uneven cooling in your home, the next step is figuring out what can fix it. Some adjustments are simple, while others may need professional input. In any case, solving these airflow and insulation issues can make your home feel more comfortable fast.

Start with insulation. Older homes or rooms above garages and attic spaces often lack enough insulation to trap cooled air. Improving insulation in attics, crawl spaces, and exterior-facing walls can reduce heat gain and help cooled air stay inside for longer. This is especially helpful on hot Duluth days when outside heat tries to force its way in through thin walls or ceilings.

Next, check all the vents. Many people don’t realize that furniture or rugs are sitting right over their floor vents or blocking wall vents without them noticing. It’s worth walking room to room and making sure each vent isn’t being covered or closed. Clear airflow allows the AC to push cool air throughout the house evenly.

Air filter checks are often overlooked. Dirty filters can limit how much air the system pulls in and sends through the ducts. Set a reminder to check and replace your HVAC filter once a month during the summer. This simple habit can keep airflow steady from the source and reduce the chances of warm zones forming.

System size matters too. If your home has been renovated or if you’re in a house that was built with generic HVAC sizing standards, there’s a chance the system isn’t a good fit for your square footage. Undersized systems can’t cool larger spaces well, and oversized units don’t stay on long enough to circulate cool air throughout. Evaluating the unit’s capacity with a trained HVAC professional helps identify if system replacement or ductwork adjustments are needed.

Here’s a basic checklist to work through:

– Add or replace insulation in problem areas
– Move furniture, rugs, or storage away from vents
– Open all supply vents fully for better flow
– Replace or clean the HVAC air filter
– Ask a qualified technician to assess your system size

No single solution works for every home. Identifying the most likely sources first makes it easier to decide which steps will bring the best results.

Benefits of Professional Inspection and Maintenance

While some homeowners may spot clear warning signs themselves, deeper HVAC issues aren’t always easy to identify. Inspections by experienced technicians help get to the root of uneven cooling problems and prevent small issues from turning into bigger ones. Professional input can go beyond surface checks and uncover gaps that typical troubleshooting won’t catch.

During an inspection, our professionals can use tools to measure airflow and test your system under real-time conditions. That means they aren’t guessing what’s going wrong. They can pinpoint whether the issue comes from poor duct design, low refrigerant, or improper equipment sizing. When airflow is reviewed as a whole instead of room by room, solutions tend to be more effective and last longer.

Routine maintenance visits also give our technicians the opportunity to clean coils, adjust blower motors, spot leaks, and improve system balance. These tune-ups can help restore overall performance of your HVAC system, so it maintains steady cooling even when demand is high. If one room continues to suffer no matter how many filters you change, having the entire system checked is often the best choice.

For example, one Duluth homeowner dealt with an upstairs bedroom that never cooled down, no matter how low the thermostat was set. After an inspection, it turned out the ductwork feeding that room had collapsed inside the attic space. It wasn’t something anyone noticed from inside the home, but it had trapped and redirected airflow away from the vent. A repair to that one area fixed the problem and balanced out the whole upstairs temperature.

Restoring Comfort in Your Duluth Home

Fixing uneven cooling might feel frustrating at first, especially when nothing seems to make much of a difference. But once the cause is found, whether it’s poor airflow, bad insulation, or something more technical, the fix is usually within reach. Taking time to address the issue helps make day-to-day living more comfortable and often saves you from bigger headaches later on.

Every home in Duluth has a slightly different layout, sun exposure, and system setup. What works for one might not work for another. Still, the goal stays the same: cool air where you want it, when you need it. Paying attention to airflow, checking vent access, and bringing in experienced technicians when the problem goes deeper is the combination that brings long-term comfort.

If uneven cooling continues to affect your comfort at home, consider working with an HVAC contractor in Duluth who can evaluate system sizing, ductwork, and insulation issues for a lasting solution. Just Cooling ATL understands the challenges homeowners face when coping with inconsistent cooling and offers support from our professionals to help restore balance to every room. For a quick estimate or to book a service visit, please contact us today.

Heat Pump

Is Your Heat Pump Short Cycling? Here’s What to Do

When a heat pump starts turning on and off too quickly, it’s called short cycling. This issue can disrupt home comfort, increase energy use, and wear down your system faster than normal. Most homeowners in Duluth first notice the problem when rooms don’t stay cool for long and energy bills start creeping up. A properly functioning heat pump should run in consistent cycles, especially during high-heat months like July. So when it doesn’t, something isn’t right behind the scenes.

Short cycling is more than just an annoyance. It puts heavy strain on the system and can eventually lead to bigger and more expensive repairs. If your heat pump kicks on, runs for a minute or two, then shuts down and starts again shortly after, it’s trying to tell you something is wrong. Figuring out the cause quickly can save you from unnecessary costs and keep your home cool through the Duluth summer.

Common Causes Of Heat Pump Short Cycling

Several issues can lead to short cycling, and they’re not always easy to spot without experience. Recognizing these common causes can help you understand why your system may be acting up.

– Incorrect thermostat settings: If your thermostat is too sensitive or installed in a poor location, like near a vent or window, it may misread the home’s temperature and send mixed signals to the system.

– Wrong refrigerant levels: Too much or too little refrigerant interferes with how the heat pump absorbs and transfers heat. This can stress the compressor and cause it to switch off early.

– Electrical problems: Loose wires, faulty relays, or a damaged compressor timer can abruptly interrupt power to your system.

– Dirty air filters or blocked vents: These raise system pressure and airflow resistance, making the unit overheat and shut down unexpectedly.

– Malfunctioning parts: A failing compressor, capacitor, or control board can also trigger irregular cycling.

A heat pump is built for steady performance. Imagine someone running laps but stopping every few seconds—they’d tire out quickly and never reach their goal. Short cycling has the same effect on your heat pump. It wastes energy without achieving consistent comfort. If it continues, the damage adds up fast.

Immediate Steps Homeowners Can Take

If your heat pump has started short cycling, there are a few things you can check while waiting for help. These steps won’t solve the issue long-term, but they may keep the problem from getting worse in the meantime.

1. Check thermostat placement and settings

– Make sure it’s not installed near a heat source or where it gets direct sunlight.
– If your thermostat uses batteries, try changing them.
– Reset the thermostat or adjust the setting by a few degrees to see if it changes the cycling pattern.

2. Inspect the air filters

– Slide them out and look for buildup. If they appear dusty or clogged, it’s time to replace them.
– During a hot summer in Duluth, checking filters monthly is a good habit to prevent airflow problems.

3. Look for closed or blocked vents

– Walk through your rooms and check that no furniture, blinds, or rugs are covering vents.
– Open all supply and return vents to help balance airflow.

4. Notice any unusual sounds or smells

– Listen for buzzing, clicking, or strange humming, and be aware of any chemical-like smells.
– These could point to an electrical or refrigerant problem. If you notice anything concerning, shut off the unit and wait for a professional inspection.

These steps can prevent further stress on the system while you wait for service. While they won’t stop short cycling fully, they may slow the damage and help keep your Duluth home more comfortable in the short term.

Why Professional Diagnosis Is Important

Once you’ve eliminated the basic causes like thermostat placement or a dirty filter, it’s time for a qualified technician to take a closer look. Heat pumps are complex systems, and trying to repair them without training can lead to bigger problems.

If the system has the wrong refrigerant charge or a hidden leak, adding more refrigerant will not fix the issue. It may even make things worse or cause damage to the compressor. Electrical failures are another area that require careful testing. Something like a damaged capacitor or malfunctioning control board won’t be visible from the outside and could fry other parts of the system if ignored. Diagnosing these problems takes special gauges, meters, and technical knowledge.

When our professionals service a short cycling heat pump, they thoroughly test each part of the system, including wiring, relays, refrigerant levels, and cooling sequences. That way, they can find the true cause instead of just treating a symptom.

Using a professional for short cycling issues also protects your manufacturer’s warranty. Most warranties require all service to be performed by licensed HVAC professionals. Trying to fix things without documentation could cancel this coverage. Our technicians provide detailed evaluations and repairs that restore performance and help avoid a repeat of the issue later on.

Preventive Measures To Avoid Heat Pump Short Cycling

Once your heat pump has been repaired, ongoing care helps prevent short cycling from returning. Many of the most common causes can be avoided with steady maintenance and good system habits.

Here are a few tips that can help reduce the chances of short cycling:

– Schedule seasonal maintenance

Contact our technicians before summer each year for a full system review. During their visit, they clean coils, tighten wiring, and check parts for wear to catch problems early.

– Calibrate or upgrade your thermostat

If your thermostat no longer reads temperature correctly or responds slowly, replacing it or recalibrating it gives your system a better chance of running normally.

– Keep the outdoor unit clear

Leaves, yard clippings, or nearby bushes can block airflow. Maintain a clear zone of at least a few feet around the outdoor unit to ensure efficient operation.

– Avoid blocking vents

Vents that are closed or covered prevent airflow and trap heat in your system. Keep these areas free of obstruction to avoid pressure buildup and overheating.

Routine care not only improves performance, but also extends the unit’s lifespan. When the system starts and stops in balanced cycles, it uses less energy and provides steady comfort without extra stress on components.

Getting Back to Comfort in Duluth

Short cycling can turn a dependable cooling system into a headache. If you’re seeing fast on-and-off behavior more than once per hour, it’s a sign your equipment is struggling. Unchecked, these issues can lead to higher costs and less reliable cooling during the hottest parts of the season.

Addressing short cycling early and choosing the right professionals for the job helps prevent more serious problems. From airflow adjustments to complex repairs, targeted service resolves cycling issues at the source and restores comfort inside your Duluth home.

Whether the problem involves your thermostat, refrigerant system, or internal parts, getting a proper diagnosis and repair is the fastest way back to a cooler, more stable environment. Letting problems linger can make things worse—and your comfort shouldn’t have to wait.

If your heat pump is acting up and you want to ensure your system operates in full cycles throughout the season, consider heat pump installation in Duluth that prioritizes consistent performance and long-term comfort. Just Cooling ATL delivers dependable solutions to resolve current issues and prevent future disruptions. For a quick estimate or to book a service visit, please contact us today.

AC

Solutions for AC Systems That Keep Tripping Your Circuit Breaker

It’s a hot summer day in Duluth, and your home should be a cool escape from the heat. Instead, you turn on your air conditioner only for it to shut down almost immediately. You walk over to the breaker box and find the circuit has tripped again. This issue can be more than frustrating. It can prevent your AC from working when you need it most and may point to bigger problems hiding in your system.

When an AC system repeatedly trips the circuit breaker, it’s often a sign of an electrical problem or mechanical issue that should not be ignored. Lingering issues like these can cause more damage, raise repair costs, or even pose safety threats, such as fire risks. Whether you’re running a new unit or relying on an older system, recognizing and fixing the issue early saves money and prevents strain on your electrical system during Duluth’s peak summer temperatures.

Common Causes of AC Systems Tripping Circuit Breakers

One of the most common reasons homeowners in Duluth face tripped breakers during the summer has to do with what’s happening inside the AC system itself.

Here are a few typical causes:

1. Overloaded Circuit

If your AC unit demands more power than the circuit can provide, the breaker shuts off to protect the system. This often happens with units that are too powerful for the existing electrical setup. An oversized unit may seem like a good idea, but it draws too much energy at once, making it a poor match for your home’s wiring.

2. Short Circuits

Damaged wiring, loose connections, or corroded parts can cause a short circuit. This sends a surge of electricity through the breaker, forcing it to trip. Shorts may be caused by aging wires, rodent bites, or faulty installation work.

3. Clogged or Dirty Air Filters

When the air filter becomes blocked, the AC has to work harder to move air. This strain can cause the system to overheat and trip the breaker. Homeowners who haven’t changed their filters in a while may notice this pattern more frequently in hot weather.

4. Faulty Mechanical Components

If a compressor, fan motor, or capacitor has started to fail, it may pull more electricity than the system was designed to handle. A failing compressor, for instance, may try to restart several times and keep tripping the breaker.

Each of these causes leads to a different kind of repair, which is why identifying the core issue quickly is so important. Ignoring the signs only increases the chances of permanent damage to your AC system or your home’s electrical wiring.

Immediate Steps to Take When Your Breaker Trips

If your breaker trips once, it might just be a random incident. But if it happens again, you need to act quickly to protect your system and your home.

Here are three important steps to take right away:

1. Turn Off the AC System

Go to your thermostat and shut the system off. This action helps prevent the system from restarting on its own and drawing more power into an already stressed circuit.

2. Check the Breaker Box

Find your breaker panel and locate the tripped switch. Flip it completely off and then back to the on position. If it trips again, don’t reset it again. Leave the AC off and move to the next step.

3. Inspect the AC Unit Briefly

Look around your condenser and air handler for any obvious problems. Is there debris blocking airflow? Do you notice melted wires, scorched smells, or odd noises when the unit operates? These may be signs of a more serious electrical issue.

These steps cover only the most visible issues. If your breaker trips more than once, the cause is probably locked inside the unit or in the wiring, which means it’s time for professional service. Using the system in this condition puts the AC and the entire electrical system at risk.

Why Professional AC Repair Is the Safer Choice

Trying to fix electrical problems on your own can be dangerous. What seems like a basic issue could involve live wiring, burned components, or loose connections that require electrical skill and specialized tools. Improper handling might lead to electric shock, further system damage, or even fire.

Guessing the problem without the right experience can make repairs harder or more expensive later. It’s not always clear whether the fault lies in the condenser, capacitor, motor, or your electrical panel. Without proper testing equipment, you won’t know if a specific part is overloading the breaker or just reacting to another fault in the system.

Our professionals use specialized tools that measure voltage, current load, and resistance to find the exact source of the problem. Once we know where the problem is, we can make targeted repairs that prevent it from coming back. Our technicians take steps to reinforce the safety and performance of your AC unit and your electrical panel so your home is protected now and in the future.

If your family depends on reliable cooling during Duluth’s hottest days, don’t attempt to fix these electrical issues alone. Our technicians are trained to handle every part of the job safely and thoroughly.

How to Keep Your AC System from Tripping in the Future

Once your AC system has been fixed, you’ll want to lower the chances of the breaker tripping again. Regular care keeps your system efficient and reduces stress on the breaker.

Here’s how to prevent future problems:

– Clean or replace your air filter monthly during the cooling season. A clean filter keeps airflow normal, which prevents overheating.
– Schedule yearly inspections with trained technicians. They can check for worn parts, loose wires, and power imbalances before they cause system failures.
– Clear the area around the outside unit. Leaves, grass, and bushes can reduce airflow around the unit, putting extra strain on it.
– Avoid plugging high-powered appliances into the same circuit as the AC. Power-hungry units like vacuum cleaners or microwaves can overload the system.
– Examine your breaker panel. If it’s outdated, it may not handle newer AC units well. Ask a technician to inspect your panel and recommend updates if needed.

Just one overlooked detail—such as a loose wire or a clogged coil—can lead to weeks of repeated tripping and disruption. One Duluth homeowner experienced exactly this issue. Their unit kept shutting down every two or three days. After one service visit, a few simple adjustments—a new breaker, a cleaned coil, and a tightened wire—kept the system running trouble-free for the rest of the summer. It’s proof that early repairs and smart upkeep go a long way.

Restoring Comfort in Your Duluth Home

No one wants to deal with an AC unit that keeps shutting down during the hottest days. If your breaker keeps tripping, there’s a reason behind it. Whether it’s from a blocked filter, faulty component, or bad wiring, ignoring the issue could lead to bigger repairs or even a risk to your safety.

Catching the issue early and calling trained professionals is the most reliable path forward. A tested and properly repaired AC will last longer, cool more efficiently, and keep your Duluth home safe as temperatures rise. Don’t brush off electrical problems, especially in the middle of summer. If your cooling system seems off track, get it checked before it becomes a major headache.

If you’re experiencing repeated cooling problems or suspect your system isn’t running efficiently, it may be time to consider professional AC installation in Duluth to restore dependable indoor comfort. Just Cooling ATL is equipped to identify underlying issues and deliver reliable solutions tailored to your home. For a quick estimate or to book a service visit, please contact us today.

Outside AC

Why is Your Outside AC Unit Making Grinding Noises?

Hearing a grinding noise coming from your outside AC unit can be more than just annoying. It is often a sign that something is wrong inside the system. During a hot Duluth summer, the last thing any homeowner wants is to deal with unexpected cooling problems. That noise is trying to tell you something is wearing out, broken, or about to fail. If left alone, it will not just go away and can lead to bigger repair costs or complete system failure.

Noise like this is never normal, and it should not be ignored. Even if the unit seems to be cooling your home, grinding sounds are warning signs. They often point to mechanical issues that can worsen quickly. Addressing them early helps avoid expensive damage and keeps your AC running smoother when you need it most. Here is what might be causing the noise and what steps you can take right away to stay cool and safe.

Common Causes of Grinding Noises in Your Outside Unit

When you hear grinding noises from your outdoor AC unit, it usually means a mechanical part is worn out or under stress. Below are the most common causes behind these sounds.

1. Worn-out motor bearings

The fan motor inside your AC uses bearings that let it spin with minimal resistance. Over time, these bearings begin to wear out, especially if regular maintenance has been skipped. When that happens, metal starts rubbing against metal, creating a grinding noise. The longer the bearings go without replacement, the more harm they can do to other motor parts.

2. Damaged or off-balance fan blades

A fan blade that is bent or broken can disrupt the balance of the system. As the fan spins, it may begin scraping or grinding against the internal housing or motor, producing sharp or grinding noises. Something as small as a twig or a buildup of debris inside the unit can lead to this, especially if panels become loose or alignment is off.

3. Compressor wear and tear

If the grinding sound is coming from the lower section of the unit and has a deeper tone, the issue may be inside the compressor. This part is central to your AC system and includes several moving pieces that can wear out over time. Grinding inside the compressor often means internal parts are beginning to break down. Because compressors are sealed and complicated, this type of noise requires fast attention to prevent system failure.

Whether the noise is from the fan, motor bearings, or compressor, it reflects wear and tear that affects how well your AC cools your home. Just because the system is still pumping out cold air does not mean everything is okay. Ignoring strange sounds almost always leads to more damage.

What to Do Right Away When You Hear Grinding

As soon as you hear a grinding sound, take action before more damage happens. Many homeowners assume the noise is harmless or that it will go away. This can result in higher repair costs or even complete system failure.

Here are the steps to take immediately:

– Turn off the AC using the thermostat. This stops moving parts and reduces the risk of increased damage.
– Do a basic visual check of the outdoor unit. Look for debris, loose panels, or any fan parts that look damaged or out of place.
– Do not try to fix anything yourself. AC units are tightly built, and touching the wrong part can cause more harm.
– Make a note or record the noise. Is it steady, loud, or does it come and go? Explaining this to our technicians helps speed up the repair process.
– Do not turn the unit back on until a professional evaluates it.

Quick action prevents damage from spreading to other parts of your HVAC system. Responding fast also keeps your repair bill lower and helps prevent long service delays.

Why You Shouldn’t Tackle HVAC Repair Alone

After hearing a grinding noise and turning off the system, you might feel tempted to research and try a quick fix. But AC issues connected to grinding sounds are rarely simple. They are almost always tied to parts deeper in the system that require specific tools and training.

Fixing these problems without proper knowledge can lead to more mechanical failures or unsafe conditions. Most outside AC units connect directly to your home’s electrical system. Accidentally touching wires or opening high-pressure sections can cause electric shock or injury. Even small errors can cause bigger damage to expensive components.

Different issues can also sound the same to someone unfamiliar with HVAC systems. A failing fan motor and a compressor on the brink of failure might sound similar. Replacing the wrong component can waste time and money. Our technicians understand how to tell these problems apart. They use tested methods to find the exact problem and get the system working again with minimal downtime.

When your comfort depends on a working AC system during a Duluth summer, expert repair matters. Hiring professionally trained technicians protects your system and your safety.

How to Prevent Grinding Noises in the Future

While some parts wear out over time, there are practical ways to reduce the risk of future grinding noises and AC problems. Ongoing maintenance and attention to your system make a big difference in catching problems before they grow.

Here are some helpful habits to follow:

– Schedule preventive maintenance each season. Routine checks can catch signs of failing bearings or misaligned fan blades before noises start.
– Clean the area around the outside unit often. Leaves, grass, and small branches can get inside and knock parts out of place. Keep nearby bushes trimmed to allow airflow.
– Pay attention to how the system sounds. Take a moment once a week to listen while the unit runs. Any new sound may be a hint of a coming issue.
– Replace air filters on time. Clogged filters reduce airflow and increase the workload on moving parts inside the AC. This added strain causes parts to wear faster.
– Check the unit’s condition after storms. Strong winds or impacts from debris can knock panels loose or move unit components. A quick visual check helps spot early problems.

One recent example from Duluth involved a homeowner who reported a soft scraping noise. Since her AC still worked, she waited to call. Two weeks later, the system stopped blowing cold air. Our technician found a damaged fan blade that eventually affected the motor. Repairing both parts took longer and cost more than an early service visit would have.

Restoring Comfort in Your Duluth Home

Grinding noises coming from your AC are warning signs that should never be ignored. They often signal wear or failure in key components such as the motor, fan, or compressor. Taking early action allows problems to be fixed before they grow and saves money in the long run.

Consistent maintenance, weekly checks, and knowing what to listen for go a long way toward keeping your system strong through Duluth’s summer heat. When something doesn’t sound right, acting early can keep things cool at home and help avoid larger repair bills later. Let trained professionals evaluate the noise quickly and make needed repairs so you can stay comfortable all season.

If your AC unit is making grinding noises and you need dependable HVAC repair in Duluth to restore comfort at home, Just Cooling ATL can help you address the issue before it worsens; taking quick action not only prevents further damage but also gives you peace of mind during the hot summer months. For a quick estimate or to book a service visit, please contact us today.

AC

How to Handle Late Night AC Failures During Heat Waves

A broken AC is never convenient, but when it fails during a blazing hot night, the discomfort sets in fast. The temperature doesn’t drop much after sunset during a heat wave in Duluth, and indoor air can quickly become stifling without proper cooling. Sleep becomes difficult, rooms feel sticky, and frustration builds as the night drags on. Whether your unit suddenly shuts down or starts blowing warm air, it can feel like there’s no relief in sight, especially when most service calls have to wait until morning.

Late-night AC failures often come with added stress because options feel limited. Figuring out what’s going wrong and what you can do next can make a big difference in your comfort and safety. Knowing which steps to take right away may help restore some cooling or at least prevent further damage while you wait for professional help. Whether it’s a minor glitch or a more serious issue developing from hours of strain on the system, action taken early can prevent a complete shutdown or extended downtime.

Common Causes of Late Night AC Failures

Heat waves put a lot of pressure on air conditioning systems in Duluth, especially ones that are older or haven’t been serviced in a while. When an AC system runs almost non-stop throughout the day, key parts can become overworked. If those components start to fail, the effects can show up when the outside temperature is still high late into the evening.

Here are some of the most common reasons an AC might quit working at night during extreme heat:

1. Overheating

Constant daytime use raises internal system temperatures. Once the system reaches a critical point, it may shut down as a safety measure to avoid damage. This often happens in the evening after the AC has been running for hours without a break.

2. Electrical Issues

Heat waves usually increase demand on the power grid. This can impact voltage levels in the home. Power surges or irregular flow may trip breakers, damage wiring, or confuse electronics inside your unit, leading to partial or complete shutdowns.

3. Compressor Failure

The compressor does most of the heavy lifting inside the AC. When it’s overworked for days in a row, an older or neglected unit could see compressor wear speed up. Late-night breakdowns are often traced back to this key part giving out under pressure.

4. Clogged Filters or Blocked Vents

When airflow is limited due to clogged filters or poorly placed furniture, your system has to work harder. Over time this buildup in resistance can reduce efficiency and trigger faults, leading to breakdowns when you least expect them.

5. Frozen Coils

This might seem unlikely during intense heat, but it happens more than people think. Low refrigerant levels or poor airflow can cause evaporator coils to freeze, tricking the AC into acting like it’s working, while in reality cooling gets weaker until it stops.

It’s not always possible to tell what exactly caused the failure in the middle of the night. But understanding how heat strain impacts your AC gives you a better idea of what might be going on and helps in deciding when and how to act.

Immediate Steps to Take When AC Fails at Night

When your AC stops working during the night, comfort can disappear quickly. You don’t always have to wait for morning to begin solving the issue. There are a few basic checks that can help you understand what’s happening and possibly restore temporary relief until help arrives.

Start with this quick checklist:

– Check the thermostat. Make sure it’s set to cool and not accidentally bumped into heat or off. A blank display may mean low batteries or a tripped circuit.

– Inspect the circuit breaker. If it’s tripped, reset it and see if the system restarts. If it keeps tripping, leave it alone and make a note for our technicians.

– Replace or clean the air filter. A dirty filter can cause the unit to shut down due to restricted airflow. Replacing it may help the system resume normal operation.

– Listen for unusual sounds. Clicking, buzzing, or humming may point to electrical problems or a seized component. If anything sounds off, stop running the system.

– Look for ice on the unit. If your indoor coils or outdoor unit have frost on them, turn off the AC and switch the fan on to help melt the ice safely.

If the system doesn’t turn back on or blows warm air after these checks, it’s best to avoid forcing it to run further. Running a struggling system can make the problem worse or damage internal parts.

Meanwhile, use temporary cooling options to manage comfort. Use ceiling or floor fans to better circulate air, especially near windows that are open slightly to let cooler air in. Avoid using heat-generating appliances like stovetops or ovens. Close blinds and curtains in rooms that get early morning sun, as even a small indoor temperature drop overnight helps make the next day easier to handle. Sleep in the coolest part of your home, whether that’s a finished basement or a shaded bedroom. These short-term adjustments can help you stay more comfortable while waiting for emergency AC repair in Duluth.

When to Call for Emergency AC Repair

Some AC failures are inconveniences you can manage for a short period. Others are serious enough that waiting until morning just isn’t an option. Knowing the signs that call for emergency AC repair helps you avoid further damage to your system or health risks inside your home. During a heat wave in Duluth, heat indoors builds up quickly without working cooling, especially for small children, older adults, or anyone with medical conditions that make them sensitive to heat.

If any of the following conditions are present, your best move is to call for emergency AC repair:

– The unit won’t turn on at all, even after checking the thermostat and breaker.

– You hear loud or unusual noises, like clanking, hissing, or buzzing.

– You notice a burning smell or the scent of melted plastic.

– Liquid is leaking around the indoor unit or pooling near the outdoor condenser.

– Airflow from vents has completely stopped.

– The system is cycling rapidly or keeps shutting off after a few minutes.

These problems usually point to underlying issues like electrical faults, compressor damage, or even frozen coils that can worsen if left unchecked. For example, a homeowner in Duluth reported their AC clicking loudly, followed by warm air blowing out of the vents. Within two hours, the unit shut off entirely. It turned out the capacitor had failed, a small part, but one that requires safe handling and quick replacement to restore function.

If you’ve already tried the basic steps but your AC still isn’t running correctly, don’t wait for the issue to correct itself. Call our professionals with experience in emergency AC repair in Duluth. Handling these problems right away saves you from more costly repairs later and makes sure your home stays safe and livable.

Tips for Preventing Future Late-Night Failures

Most late-night air conditioning problems don’t come out of nowhere. They often build up from smaller issues that go unnoticed until hot weather pushes the system too hard. If your AC has broken down once at night, taking steps to reduce future risk can keep your home more comfortable and avoid disruption when temperatures peak.

Use these habits to lower the chances of repeated failures:

– Schedule a system inspection before summer starts. Catching small issues like worn belts, dirty coils, or low refrigerant makes a big difference when heat waves arrive.

– Set thermostat schedules. Letting the system run continuously can overwork it. Use programmed settings to reduce workload at night when you’re sleeping.

– Change your filters regularly. Dirty air filters choke airflow and stress the internal components of your system. A clogged filter is one of the most common triggers for shutdowns during hot weather.

– Keep vents unblocked. Make sure rugs, boxes, or furniture aren’t limiting airflow. This helps prevent unstable pressure inside your ductwork and allows the AC to perform evenly.

– Use ceiling and portable fans on hot days. This supports the cooling system without overloading it, especially when outdoor temperatures rise above normal.

It also helps to have repair contact info handy. Keep a phone number saved somewhere easy to access, on your fridge, phone contacts, or even a note near your thermostat. During a late-night failure, you don’t want to waste time searching for a qualified HVAC technician when your home is already heating up.

Staying Cool Until Help Arrives

Even with good habits in place, no AC system is immune to breakdowns forever. When the unit goes down in the middle of a Duluth summer night, how you handle things until help arrives can affect how you feel and how well your home handles the heat.

Try these steps to improve comfort in the short-term:

– Close blinds and curtains to slow the rise of indoor temperatures.

– Run electric fans to keep air moving, especially near open windows during cooler hours.

– Stay on one floor. Heat rises, so if your home has levels, stay downstairs where it’s naturally cooler.

– Avoid cooking indoors. Ovens and stoves create more heat than most people realize at night.

– Dress lightly and use breathable fabrics for bedding to improve sleep quality.

– Stay hydrated. Drink plenty of fluids even if you don’t feel thirsty. Heat stress builds slowly and staying cool is about more than just temperature.

Keeping calm helps, too. While a late-night failure feels urgent, taking logical steps and minimizing heat in your home can protect your family’s comfort while you wait for professional repair. With the right actions in place, most people can manage well enough through the night without making the situation worse or putting safety at risk.

Handling an AC breakdown during overnight heat in Duluth isn’t ideal, but it doesn’t have to ruin your night. Recognizing signs early, knowing when to call for help, and using smart techniques to stay comfortable helps you minimize stress while preventing further damage to your system. A little planning goes a long way toward making sure you’re ready if it happens again.

Just Cooling ATL understands that a late-night breakdown can seriously affect your comfort, and if you require emergency AC repair in Duluth, our professionals are ready to help restore cool air to your home quickly. Acting before the heat intensifies helps residents experience smoother relief by relying on experienced service and prompt follow-up. For a quick estimate or to book a service visit, please contact us today.

AC

Troubleshooting Your AC’s Sudden Airflow Problems

When your air conditioner suddenly stops blowing air like it used to, it’s not just annoying – it can make your home uncomfortable fast. If the vents feel weak or it seems like cool air is barely making its way through your rooms, something is off. Sudden drops in airflow are a sign that the system isn’t functioning how it should. And during a hot summer in Duluth, this can lead to stuffy rooms, rising indoor temperatures, and higher energy usage as the system works harder to deliver the same results.

Airflow problems can catch you by surprise. One day things seem fine, and the next you’re wondering why a room isn’t cooling down at all. The longer the issue goes unchecked, the more stress it puts on your AC system. That’s why it’s important to dig into the cause quickly and fix it before it turns into a bigger repair. Whether it’s something simple like a blocked vent or something more involved like a blower motor issue, spotting the cause early makes a big difference.

Common Causes Of AC Airflow Problems

When airflow is weak or cut off entirely in some parts of your home, there are a few typical issues that could be to blame. Some of these are easy to detect, while others may take a bit more investigation. Here are the most common things that can disrupt airflow in your AC:

1. Dirty Air Filters

This is one of the most common and preventable issues. When air filters are full of dust, pet hair, or debris, they can block the air from flowing through the system. A dirty filter forces your AC to work harder, which can shorten its lifespan and overheat parts of the equipment.

2. Blocked Vents or Registers

Furniture, rugs, or other items can accidentally block vents, especially in homes with rearranged layouts or smaller rooms. Covered vents reduce the amount of cool air entering a space and can decrease system pressure throughout the house.

3. Low Refrigerant Levels

Low refrigerant doesn’t just affect how cold the air is – it can also impact how much air moves through the system. If levels drop because of a leak, cooling problems follow quickly. The system may even ice over, further reducing airflow.

4. Blower Fan Problems

The blower fan helps push cooled air from the unit into your ductwork. If the motor fails or the fan blades get dirty or stuck, this can drastically cut off air delivery. Noise, weak airflow, or uneven temperatures are common signs of blower trouble.

5. Leaky Ductwork

Holes, gaps, or disconnected ducts will let cool air escape before it reaches your rooms. This loss can be hard to trace since much of your ductwork is hidden behind walls or in the attic. If one room feels cooler than the rest, it could be a duct leak.

Each of these issues can lower the comfort in your home, leading to incomplete cooling and higher energy bills. Recognizing the symptoms early can save you from bigger problems later. Addressing them quickly keeps your AC running better and your home more comfortable during Duluth’s warm months.

How To Troubleshoot Airflow Issues

If your AC’s airflow takes a sudden dip, there are a few simple things you can check before reaching out to our technicians. These steps can help spot early signs of more serious problems and prevent unnecessary stress on your system.

– Check the air filter: A clogged filter is one of the easiest things to fix but often gets overlooked. Hold it up to the light – if light doesn’t pass through easily, it’s time for a replacement. Check filters monthly, especially during high-use months like June through August.

– Inspect all vents and registers: Walk through your home and make sure each vent is open and not blocked by rugs, furniture, or curtains. It’s easy for a couch or dresser to cover a vent after redecorating a room.

– Monitor the blower fan: If air barely moves through the vents or you hear unusual humming or grinding near indoor units, the blower fan could be struggling. That could mean the motor needs to be repaired or replaced. This work needs one of our technicians to diagnose and handle safely.

– Notice any weak cooling or hissing sounds: These could point to a refrigerant problem. If cooling is uneven or the AC is running without a noticeable drop in temperature, that’s a sign to stop running the system and call our professionals.

– Look for possible duct problems: If one room feels cooler or more comfortable while others stay warm, there might be a leak or obstruction in your ductwork. Visible ducts in attics or crawl spaces might show signs of disconnection or damage, but most duct problems aren’t visible and require professional inspection.

These steps give you a good head start, but most airflow issues are better handled with trained eyes. If your system still isn’t performing well after these checks, it’s best to schedule service to prevent the issue from getting worse.

Preventative Maintenance Tips To Keep Airflow Steady

Avoiding problems down the road starts with regular care. Keeping airflow strong and your AC working smoothly during Duluth’s hotter months means staying ahead of the wear and tear.

Start with air filters. Changing them regularly is the simplest and most effective thing you can do. During summer, a good rule of thumb is to replace standard filters every one to two months. Homes with pets or high dust might need changes more often. Filters are small but play a big role in your AC’s overall performance.

Make sure your vents aren’t blocked. This includes double-checking both the supply and return air vents since both are necessary to keep air flowing correctly through the system. Something as small as a floor mat or storage box pushed over a vent can throw everything off.

Scheduling seasonal check-ups goes a long way. Our professionals can spot small issues during summer maintenance that could turn into big repairs later. That includes checking refrigerant pressure, blower performance, and duct seals, all of which affect how well your system moves air around your house.

Finally, pay attention to how your system is running during the day. If it seems like it’s cycling often, blowing weak air, or taking longer and longer to cool your space, those are signs the system isn’t working efficiently. Getting it checked early helps avoid costly failures in the middle of a heat wave.

Ensuring Comfort During Duluth Summers

Duluth summers can be tough without a reliable AC system. Weak airflow can sneak up fast and make your home warm just when you need cooling the most. Most airflow problems don’t fix themselves and avoiding them doesn’t make them go away – it just postpones the growing discomfort. Whether it’s a breeze that barely moves through the vents or entire rooms not cooling down, these are problems worth addressing quickly.

Paying attention to the early warning signs helps protect your system and keep your home running as it should. Regular maintenance and professional inspections play a huge role in keeping the airflow strong and consistent through the summer. With a little planning and timely service, staying cool in your home doesn’t have to be a struggle.

Facing persistent airflow issues during Duluth’s hot months can disrupt your comfort at home, so let Just Cooling ATL help you resolve the issue with reliable air conditioner service in Duluth that keeps your system operating efficiently all season long. For a quick estimate or to book a service visit, please contact us today.